Schoology Regular Assignments
Assignments let you enter tasks for students to review, download, and submit, completely within Schoology or in tandem with other resources. You can use each assignment as a graded item in conjunction with the Schoology Gradebook.

Creating an Assignment
To create an assignment, use the Add Materials button at the top of your Course Materials page. You can also access the Add Materials button from within a folder.
Click Add Materials.
Select Add Assignment.
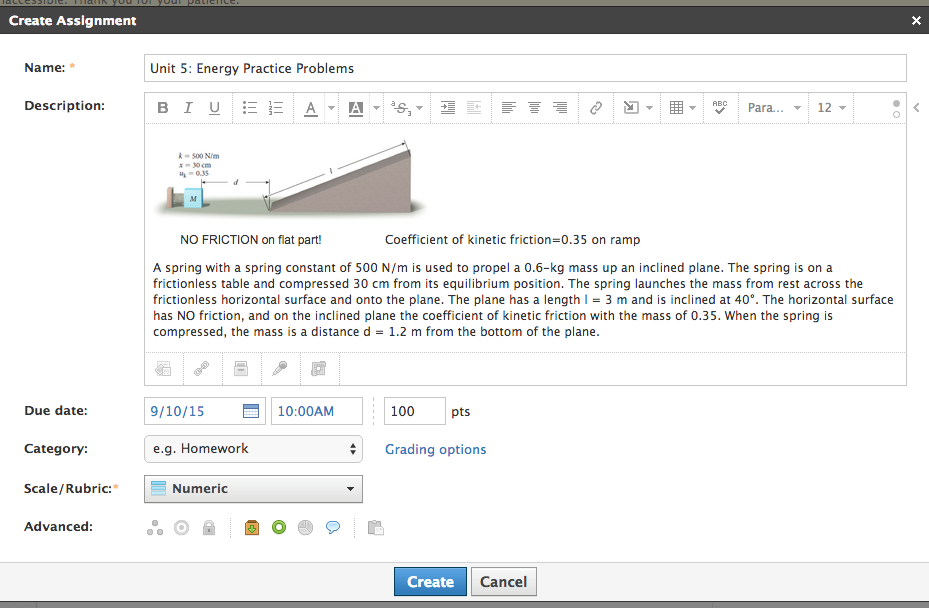
Fill out the Create Assignment form.
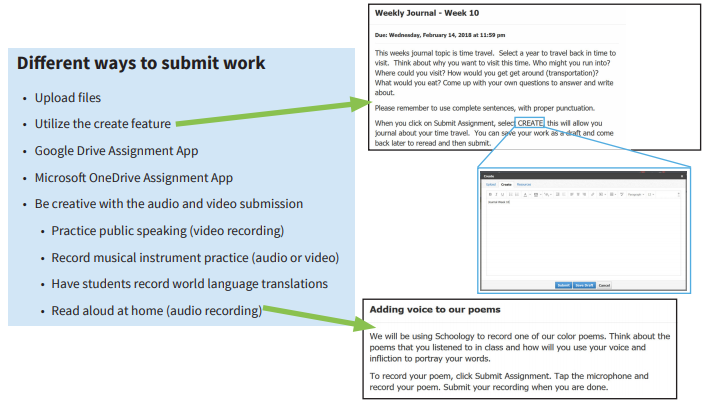
Enter a Description. Here, you can enter directions your students will need to complete the assignment. You should be very clear of what you need your students to do to complete the assignment. You can attach supporting files, add links, images, videos or any other resource that you'd like your student to review to do their assignment.
Set a Due Date to place the assignment in the Course Calendar and Upcoming area. This will also enable Overdue notifications if a student fails to submit the assignment by the due date.
IMPORTANT: If you are syncing your grades over to PT, the due date will determine the grading term in which it will appear in your PT gradebook.
Select a Grading Category from the dropdown. If you do not select a grading category, it will default to Ungraded, and will not appear in your gradebook.
Select a Scale or Rubric from the dropdown menu.

Use Options to turn on/off the following features:
Use Individually Assign to only display the assignment to a specific member of the course or a grading group.
Align Learning Objectives to add a custom learning objective, common core, or state standard. Once you have aligned your material with learning objectives, use the Mastery tool to track your students' progress.
Lock prevents students from making submissions. You may want to lock the assignment after the due date has passed.
Enable Submissions: Click the dropbox icon to provide an area for students to submit work. You can opt to disable submissions if the assignment does not require something in return from the student - for example, reading homework.
Published to student: Opt to show or hide the assignment from the student view.
Grade Statistics displays the statistics for the assignments to students, which is located in an icon above assignment submissions.
Enable Comments: This allows students to comment on the assignment. We recommend to turn off this option.
Copy to Courses: Copy the assignment with the current settings and options to another course.
4. Click Create to complete.
Assignment Tip!
If you do not plan to collect work through Schoology but still want the information to appear in the calendar area for students, be sure to disable submissions by clicking the little file box. This way students won't receive a late work notice.
Managing your Assignment
Once you click Create, the description and any additional files or links will appear on the assignment, along with the Submissions and comment tools. From this screen, you can manage assignment submissions, grade students, and participate in the comments area.
Assignment Submissions
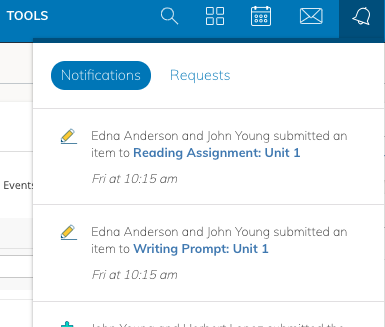
When a student makes a submission to an assignment, you will receive a notification at the top of Schoology:
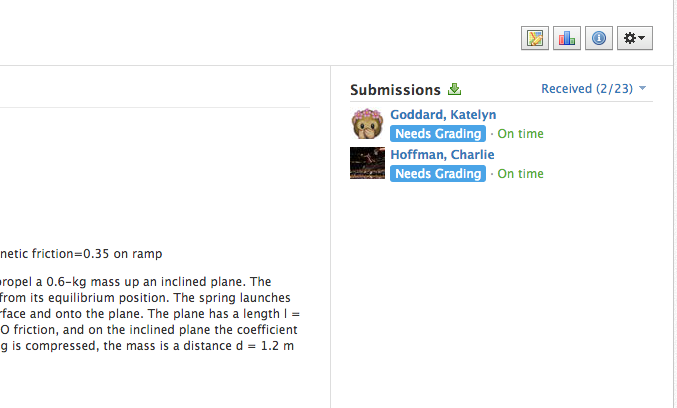
The Submissions feature is located in the right column of the Assignment. You can also access it by clicking the Assignment listed in the Calendar. Use this area to manage student-submitted files.
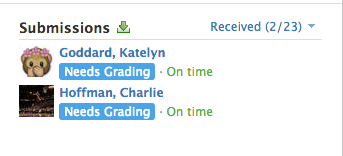
Submitted files are organized by On Time and Late, based on the assignment's Due Date. You can download or view each individual file, or you can download all assignments in a bulk .zip file.
Watch this webinar to learn more about how to create, review and grade assignments in Schoology.
Technology Support Hotline for Teachers and Staff: (209) 574-8600 and Service Center Locations